![]()
Chapter 3 .
The quest begins.
With properly packed bags the quest may now begin. Further useful information will be given when needed.
This quest will lead you into an area of shape and colour by learning you to work with layers and special effects. A rather unilluminated area with many possibilities and surprises.
Let's start with an easy exercise.
![]() Create a new image (File > New) with a white background of 250x200 pixels.
Create a new image (File > New) with a white background of 250x200 pixels.
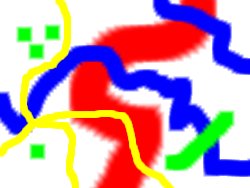
![]() Make a few broad stripes and circles using
the paint brush
Make a few broad stripes and circles using
the paint brush ![]() . You will get the clearest result later on when using strong colours. You can adjust the width of the brush using the window tool options. One of the possibilities for changing colour is pointing your mouse at the square colour window in the
'Colour Palette',
at the right of the Paint Shop Pro work space. The mouse cursor will then turn into a dropper tool and the colour you are pointing at will be displayed at the bottom in a square of the 'Colour Palette'.
. You will get the clearest result later on when using strong colours. You can adjust the width of the brush using the window tool options. One of the possibilities for changing colour is pointing your mouse at the square colour window in the
'Colour Palette',
at the right of the Paint Shop Pro work space. The mouse cursor will then turn into a dropper tool and the colour you are pointing at will be displayed at the bottom in a square of the 'Colour Palette'.


![]() Copy the image.
Copy the image.
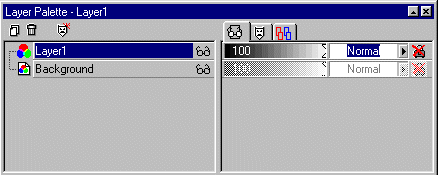
![]() Paste the image as a new layer. No change is apparent but in the 'Layer Palette' you can see a new layer has been added.
Paste the image as a new layer. No change is apparent but in the 'Layer Palette' you can see a new layer has been added.

When you click the downward triangle (at the right hand top next to the x) the window will remain open, which is easy when you are working in it a lot. Afterwards the triangle will point upward.
![]() Click the arrow next to the word
'normal' next to Layer1. A list of
layer blend modes will appear. Every possibility creates a different effect, even though this can't be easily observed
during this exercise. Click the 'Difference' mode. Now everything turns black...
Click the arrow next to the word
'normal' next to Layer1. A list of
layer blend modes will appear. Every possibility creates a different effect, even though this can't be easily observed
during this exercise. Click the 'Difference' mode. Now everything turns black...

The option 'Difference' shows the difference between the layers and as there isn't any as yet, everything seems black.
There is a list ( Help > Helptopics > Search > Layer Blend Modes) which descibes exactly what happens technically at the pixellevel, but while you are working it is far more important what the image looks like after you have used such a mode.
![]()